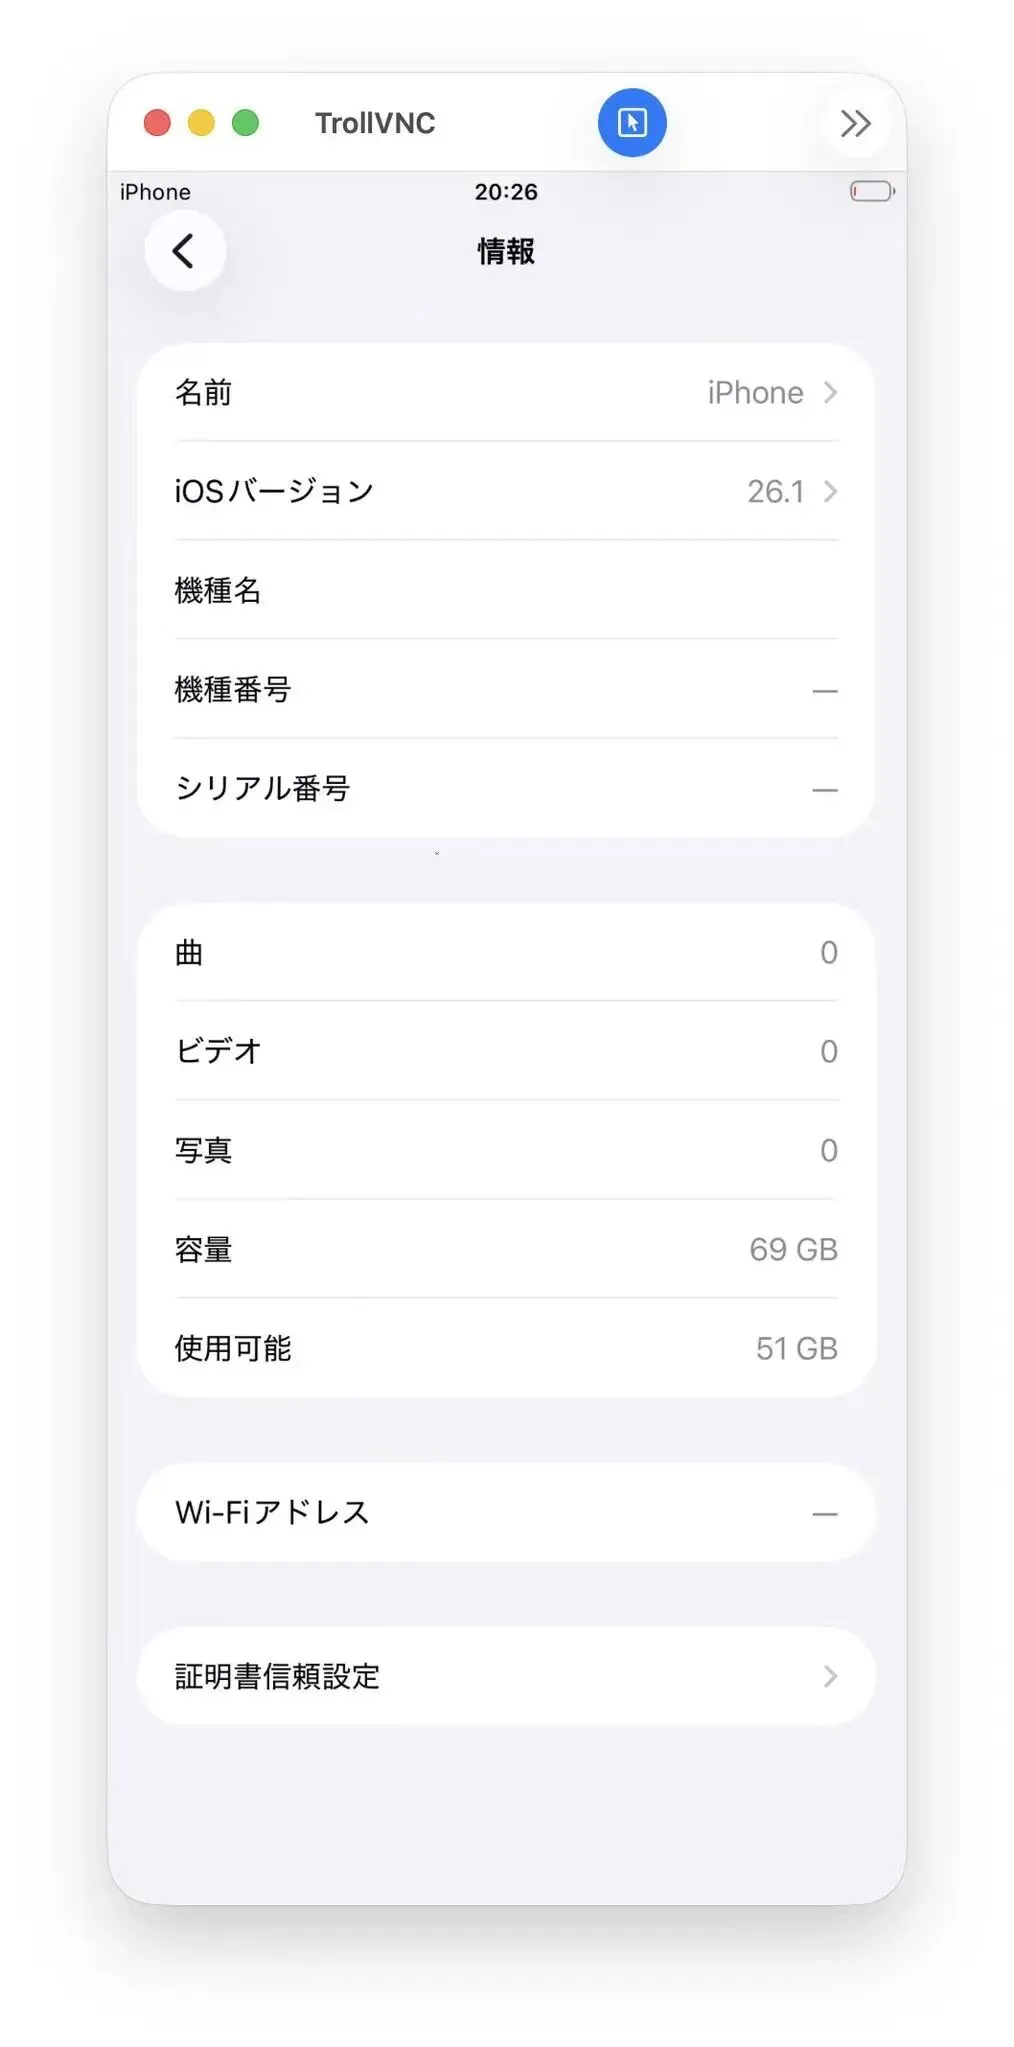
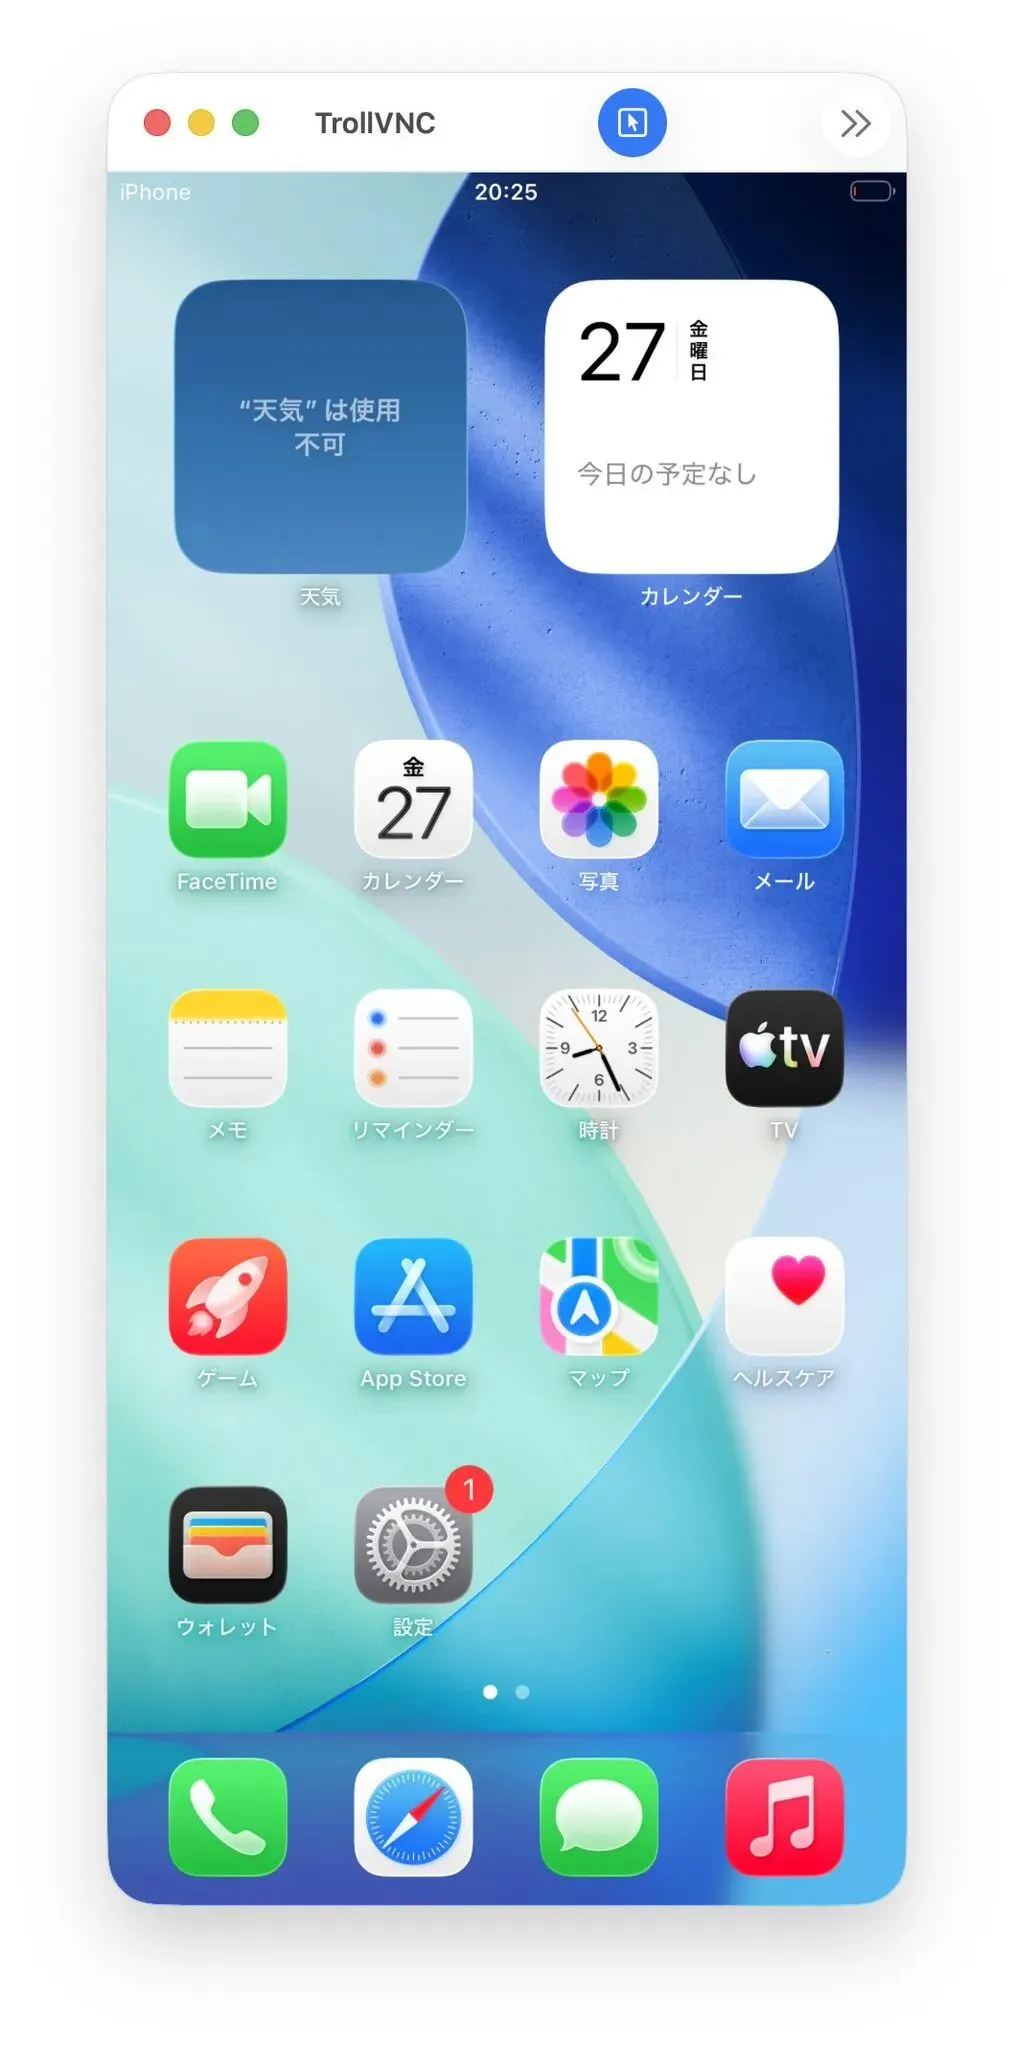
Mac启动虚拟 iPhone 支持iOS 26平台
wh1te4ever 发现的原理, Lakr233在此基础上进行优化实现如下教程Prerequisites前提条件
Disable SIP and AMFI —
required for private Virtualization.framework entitlements.
禁用 SIP 和 AMFI——私有 Virtualization.framework 权限所需。
Boot into Recovery (long press power button), open Terminal:
启动进入恢复(长按电源键),打开终端:
csrutil disable
csrutil allow-research-guests enable
After restarting into macOS:
重启进入 macOS 后:
sudo nvram boot-args="amfi_get_out_of_my_way=1 -v"
Restart once more.
再重来一次。
Install dependencies:安装依赖:
make setup_libimobiledevice   # build libimobiledevice toolchain
make setup_venv               # create Python venv
source .venv/bin/activate
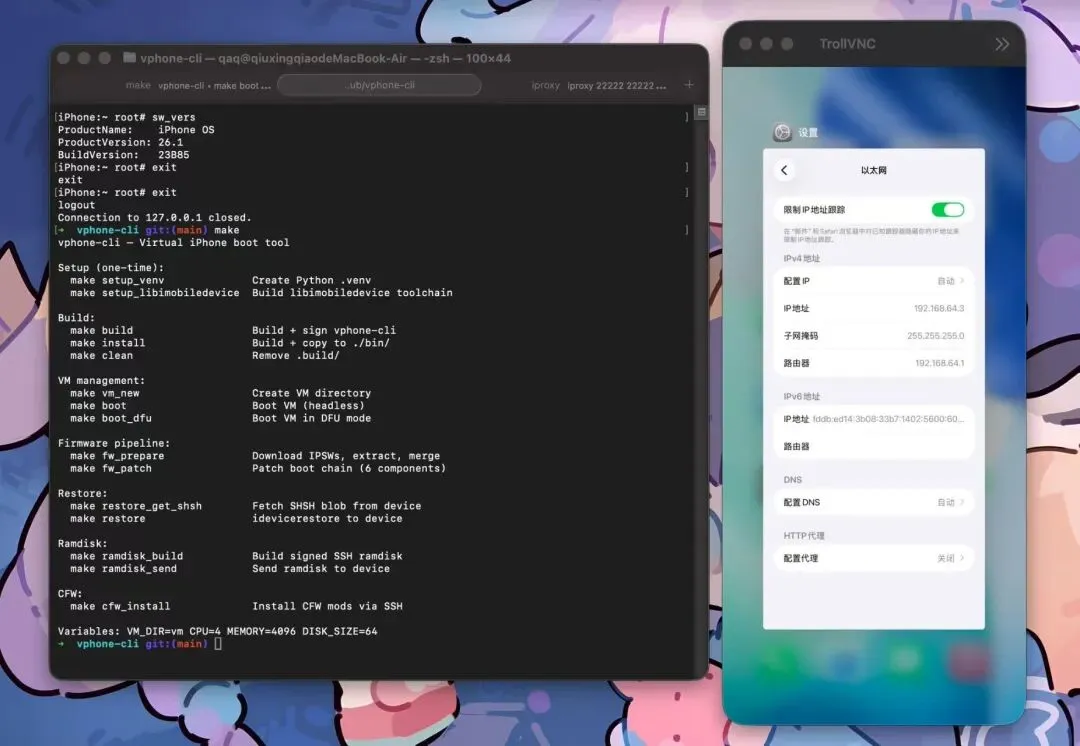
Quick Start快速入门
make build                    # build + sign vphone-cli
make vm_new                   # create vm/ directory (ROMs, disk, SEP storage)
make fw_prepare               # download IPSWs, extract, merge, generate manifest
make fw_patch                 # patch boot chain (6 components, 41+ modifications)
Restore恢复
You'll need two terminals for the restore process. Keep terminal 1 running while using terminal 2.
恢复过程中你需要两个终端 。使用 2 号航站楼时保持 1 号航站楼运行。
# terminal 1
make boot_dfu                 # boot VM in DFU mode (keep running)
# terminal 2
make restore_get_shsh         # fetch SHSH blob
make restore                  # flash firmware via idevicerestore
Ramdisk and CFW
Ramdisk 与 CFW
Stop the DFU boot in terminal 1 (Ctrl+C), then boot into DFU again for the ramdisk:
在终端 1 停止 DFU 启动(Ctrl+C),然后再次启动 DFU 以获取内存盘:
# terminal 1
make boot_dfu                 # keep running
# terminal 2
make ramdisk_build            # build signed SSH ramdisk
make ramdisk_send             # send to device
Once connected, install CFW:
连接后,安装 CFW:
# terminal 2
iproxy 222222
make cfw_install
First Boot首次被淘汰
Stop the DFU boot in terminal 1 (Ctrl+C), then:
在终端 1 停止 DFU 启动(Ctrl+C),然后:
make boot
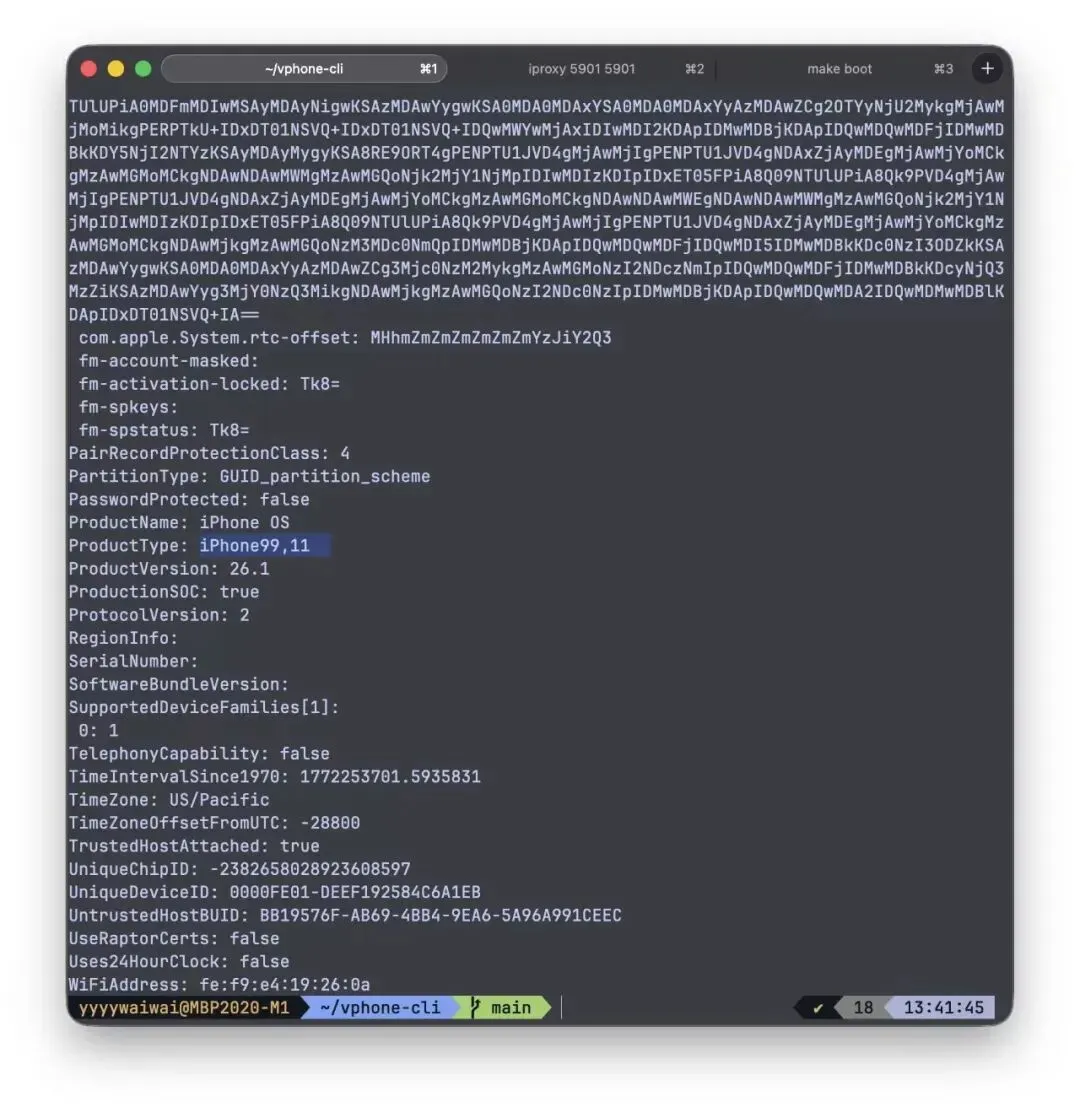
This gives you a direct console on the VM. When you see bash-4.4#, press Enter and run these commands to initialize the shell environment and generate SSH host keys:
这样你就能直接在虚拟机上作控制台 。当你看到 bash-4.4# 时,按下回车键并执行以下命令来初始化 shell 环境并生成 SSH 主机密钥:
exportPATH='/usr/local/sbin:/usr/local/bin:/usr/sbin:/usr/bin:/sbin:/bin:/usr/bin/X11:/usr/games:/iosbinpack64/usr/local/sbin:/iosbinpack64/usr/local/bin:/iosbinpack64/usr/sbin:/iosbinpack64/usr/bin:/iosbinpack64/sbin:/iosbinpack64/bin'

mkdir -p /var/dropbear
cp /iosbinpack64/etc/profile /var/profile
cp /iosbinpack64/etc/motd /var/motd

# generate SSH host keys (required for SSH to work)
dropbearkey -t rsa -f /var/dropbear/dropbear_rsa_host_key
dropbearkey -t ecdsa -f /var/dropbear/dropbear_ecdsa_host_key

shutdown -h now
Note: Without the host key generation step, dropbear (SSH server) will accept connections but immediately close them because it has no keys to perform the SSH handshake.
注: 如果没有主机密钥生成步骤,Dropbear(SSH 服务器)会接受连接,但会立即关闭连接,因为它没有密钥来执行 SSH 握手。
Subsequent Boots后续靴子
make boot
In a separate terminal, start iproxy tunnels:
在独立终端中,启动 iproxy 隧道:
iproxy 2222222222# SSH
iproxy 59015901# VNC
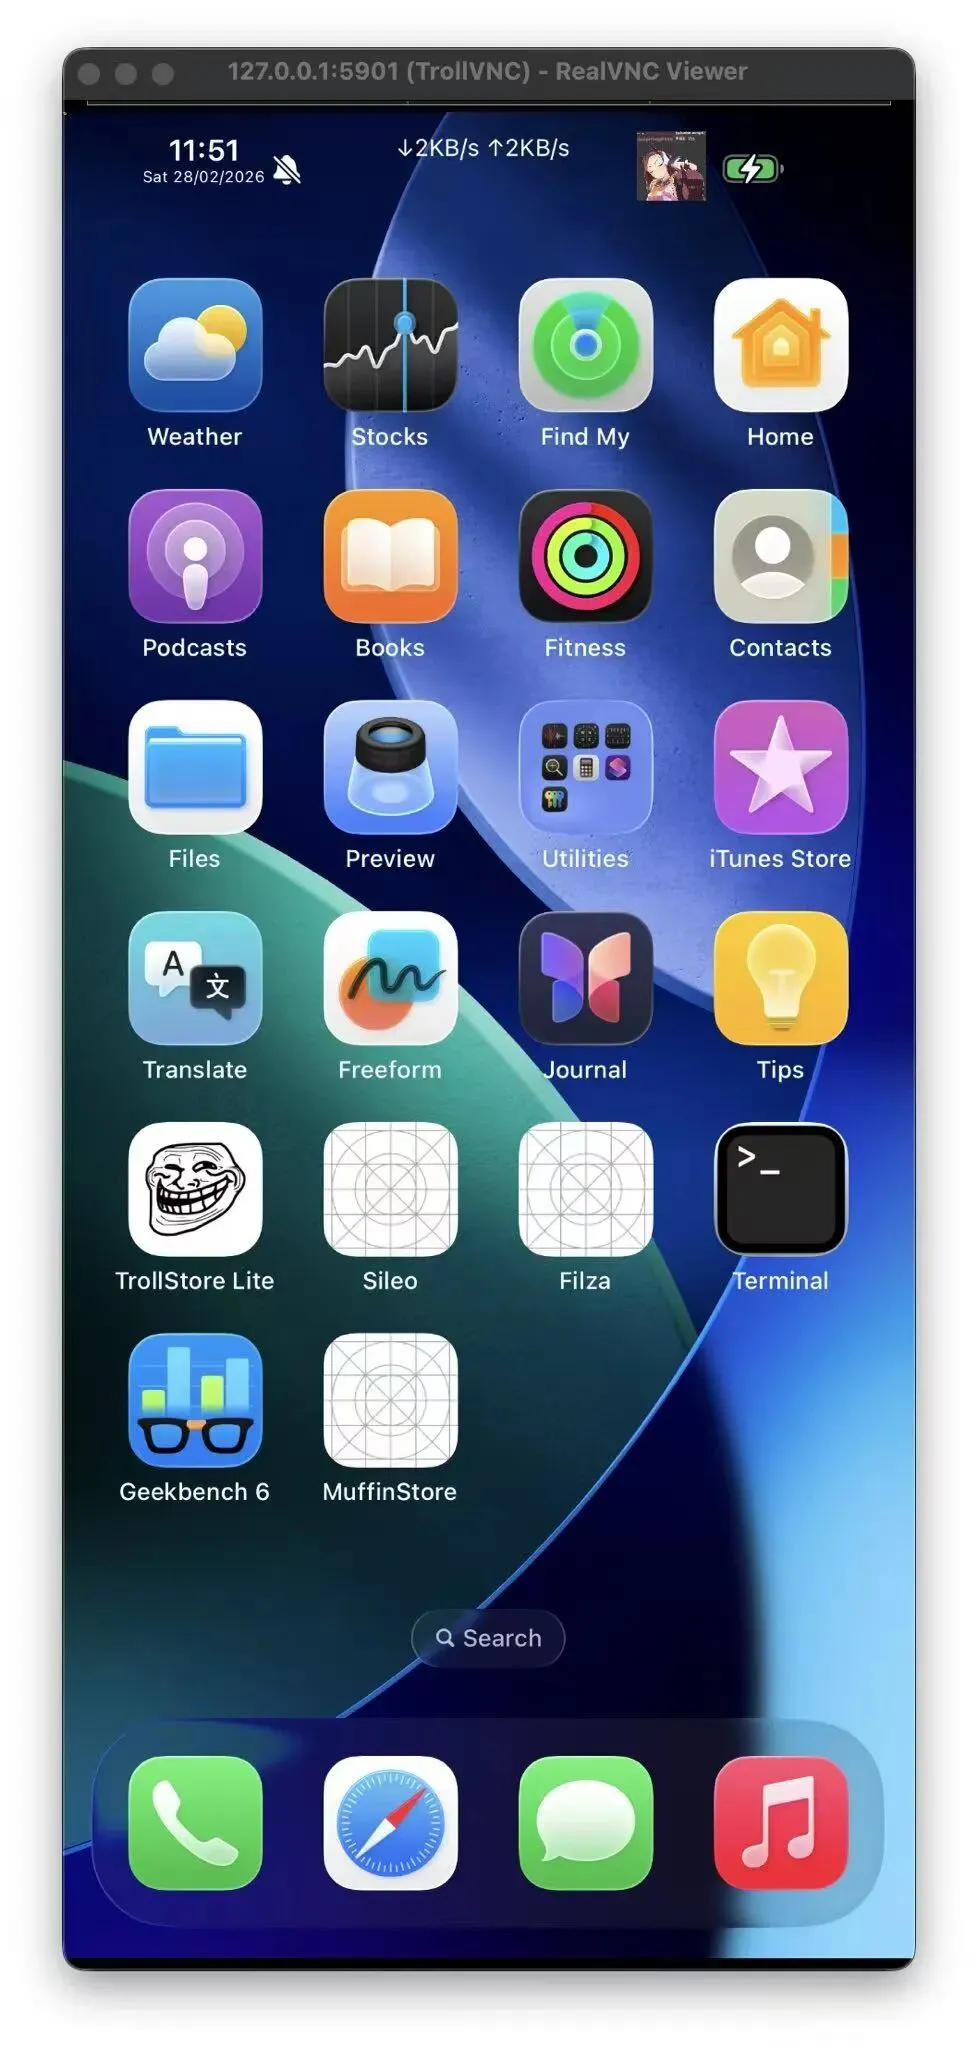
Connect via:通过以下方式连接:
- SSH:
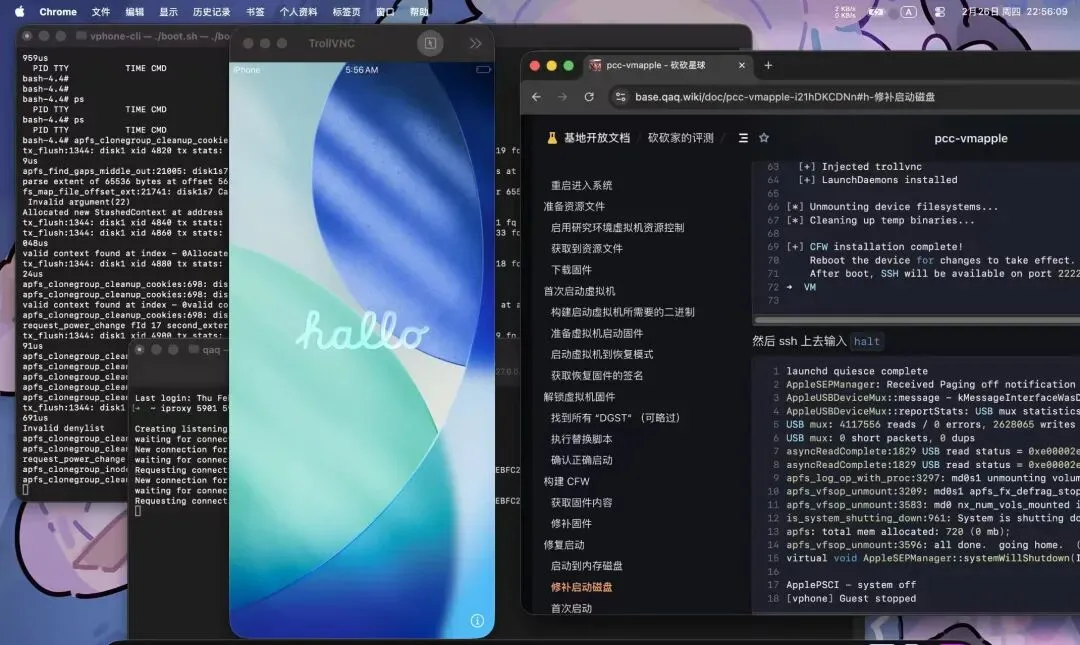
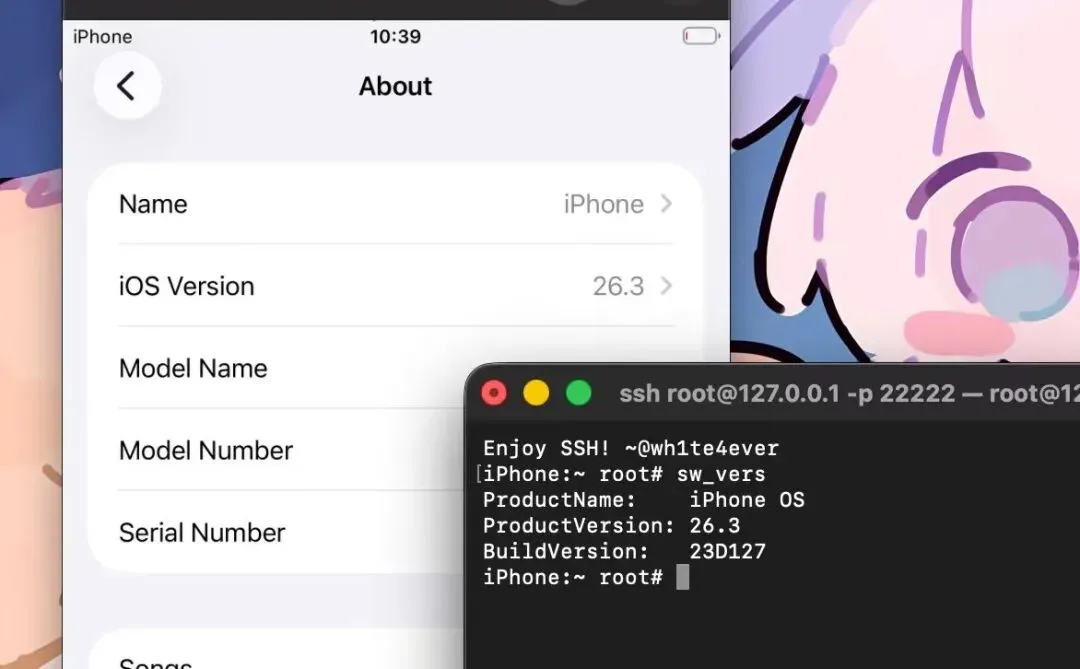
ssh -p 22222 root@127.0.0.1 (password: alpine)
SSH:ssh -p 22222 root@127.0.0.1(密码:alpine) - VNC:
vnc://127.0.0.1:5901
VNC:vnc://127.0.0.1:5901
All Make Targets全定目标
Run make help for the full list. Key targets:
快去找帮助获取完整名单。主要目标:
| |
|---|
build | |
vm_new | Create VM directory创建虚拟机目录 |
fw_prepare | Download/merge IPSWs下载/合并 IPSW |
fw_patch | |
boot | Boot VM (GUI / DFU headless)
启动虚拟机(GUI / DFU 无头) |
restore_get_shsh | Fetch SHSH blob取 SHSH blob |
restore | |
ramdisk_build | Build SSH ramdisk构建 SSH 内存盘 |
ramdisk_send | Send ramdisk to device
向设备发送 ramdisk |
cfw_install | Install CFW mods安装自制自足武器的模组 |
clean | Remove build artifacts移除构建伪影 |
FAQ常见问题
Before anything else — run git pull to make sure you have the latest version.
在做其他事情之前——先运行 git pull,确保你用的是最新版本。
Q: I get zsh: killed ./vphone-cli when trying to run it.
问:我运行时会被 zsh: killed ./vphone-cli。
AMFI is not disabled. Set the boot-arg and restart:
AMFI 没有被禁用。设置 boot-arg 并重启:
sudo nvram boot-args="amfi_get_out_of_my_way=1 -v"
Q: I'm stuck on the "Press home to continue" screen.
问:我卡在“按主页继续”界面。
Connect via VNC (vnc://127.0.0.1:5901) and right-click anywhere on the screen (two-finger click on a Mac trackpad). This simulates the home button press.
通过 VNC(vnc://127.0.0.1:5901)连接,然后在屏幕上任意位置右键点击(Mac 触控板上用两指点击)。这模拟了主页按键的作。
Q: SSH connects but immediately closes (Connection closed by 127.0.0.1).
问:SSH 连接后立即关闭( Connection closed by 127.0.0.1 )。
Dropbear host keys were not generated during first boot. Connect via VNC or the make boot console and run:
Dropbear 主机密钥在第一次启动时并未生成。通过 VNC 或 make 启动控制台连接,然后运行:
exportPATH='/usr/local/sbin:/usr/local/bin:/usr/sbin:/usr/bin:/sbin:/bin:/usr/bin/X11:/usr/games:/iosbinpack64/usr/local/sbin:/iosbinpack64/usr/local/bin:/iosbinpack64/usr/sbin:/iosbinpack64/usr/bin:/iosbinpack64/sbin:/iosbinpack64/bin'
mkdir -p /var/dropbear
dropbearkey -t rsa -f /var/dropbear/dropbear_rsa_host_key
dropbearkey -t ecdsa -f /var/dropbear/dropbear_ecdsa_host_key
killall dropbear
dropbear -R -p 22222
Q: Can I update to a newer iOS version?
问:我可以更新到更新的 iOS 版本吗?
Yes. Override fw_prepare with the IPSW URL for the version you want:
是的。用你想要的版本的 IPSW URL 覆盖 fw_prepare:
exportIPHONE_SOURCE=/path/to/some_os.ipsw
exportCLOUDOS_SOURCE=/path/to/some_os.ipsw
make fw_prepare
make fw_patch
Our patches are applied via binary analysis, not static offsets, so newer versions should work. If something breaks, ask AI for help.
我们的补丁是通过二进制分析应用的,而不是静态偏移,所以新版本应该可以正常使用。如果出现故障,向 AI 求助。
Acknowledgements致谢
- wh1te4ever/super-tart-vphone-writeup
wh1te4ever/超级酸味-vphone-writeup


 10个月宝宝每天需要喝多少奶粉?
